안내 메시지도 꾸미고 싶은 마음에 bootstrap 에 있는 Toast와 Modal을 사용해보기로했다.
토스트와 모달을 동적으로 삽입할 수 있는 방법에 대해서 포스팅하고자 한다.
📂 링크 가져오기
    <link href="https://cdn.jsdelivr.net/npm/bootstrap@5.0.2/dist/css/bootstrap.min.css" rel="stylesheet"
        integrity="sha384-EVSTQN3/azprG1Anm3QDgpJLIm9Nao0Yz1ztcQTwFspd3yD65VohhpuuCOmLASjC" crossorigin="anonymous">
    <script src="https://code.jquery.com/jquery-3.6.4.min.js"></script>
    <script src="https://cdn.jsdelivr.net/npm/bootstrap@5.1.0/dist/js/bootstrap.bundle.min.js"></script>
- HTML 의 head 부분에 위 코드를 넣어준다.
✅ Toast 삽입 방법
1️⃣ Toast 공간 지정 및 버튼 지정
- html 의 <body> 부분안에 container을 하나 만들어 줄 것이다.
<body>
    <div id="toast-container"></div>
    <button type="button" id="test-toast">Toast</button>
    ...
</body>
2️⃣ 모듈 설정
- jquery 를 사용하는데 type="module" 로 사용할 것이다. HTML head 부분에 아래의 코드를 넣어준다.
<script type="module"></script>3️⃣ 함수 만들기
- action 마다 HTML코드를 작성하는 것이 아니라, 동적으로 작동할 수 있게끔 할 것이다.
- 아래 사진과 같이 빨간 박스 안에 값만 바꿀 수 있게끔 할것이다.
- 아래의 코드를 <script="module"></script> 안에 넣어주면 된다.
// Toast 만들기
        function showToast(title, message) {
            var htmlToast = `
                <div class="toast" role="alert" aria-live="assertive" aria-atomic="true">
                    <div class="toast-header">
                        <strong class="me-auto">${title}</strong>
                        <small class="text-body-secondary">Toast</small>
                        <hr class="sep-3" />
                        <button type="button" id="toast-closeBtn" class="btn-close" data-bs-dismiss="toast" aria-label="Close"></button>
                    </div>
                    <div class="toast-body">
                        ${message}
                    </div>
                </div>
                `
            // 값이 있으면 remove 해주기
            $("#dynamicToast").remove()
            // jQuery로 Toast를 페이지에 추가
            $("#toast-container").html(htmlToast);

            // Bootstrap Toast 활성화
            let toastElement = new bootstrap.Toast($('#toast-container .toast')[0]);
            toastElement.show();
        }
- title 과 message를 변경 가능하다 !
4️⃣ Toast 닫기 리로드
- 아래의 코드를 <script="module"></script> 안에 넣어주면 된다.
        // 토스트 닫기 누르면 리로드 됨.
        $(document).on("click", "#toast-closeBtn", async function () {
            window.location.reload();
        })
- 이거는 필요한 사람만 넣으면 된다. 프론트만 만든 사람은 사용에 주의 ! 리로드가 되어서 입력했던 값들이 날아갈 수 있다 !
- 백엔드를 연결했다면, ⚠ DB 업데이트를 위해 리로드를 넣은 것이다. ⚠
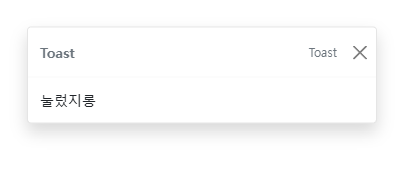
5️⃣ Toast 연결하기 / Toast 만 보여짐.
- 버튼을 클릭했을 시에 title과 message를 따로 변경 가능할 수 있게끔 했다.
- 이 함수를 응용하면 데이터가 들어올 때마다 동적으로 데이터에 맞는 title과 message를 다룰 수 있다. > 이 부분은 맨 아래에 함수로 보여주겠다.
- 아래의 코드를 <script="module"></script> 안에 넣어주면 된다.
// 응용을 안 한다면
$(document).on('click', '#test-toast', async function () {
    showToast("4번", "눌렀지롱");
});
6️⃣ 실제 실행화면
✅ Modal 삽입 방법
1️⃣HTML 작성
<button type="button" id="test-modal">Modal</button>2️⃣ 모듈 설정
- jquery 를 사용하는데 type="module" 로 사용할 것이다. HTML head 부분에 아래의 코드를 넣어준다.
<script type="module"></script>3️⃣함수 만들기
- action 마다 HTML코드를 작성하는 것이 아니라, 동적으로 작동할 수 있게끔 할 것이다.
- 아래 사진과 같이 빨간 박스 안에 값만 바꿀 수 있게끔 할것이다.
- 아래의 코드를 <script="module"></script> 안에 넣어주면 된다.
// 모달 만들기
function actionModal(title, message, action) {
    // 모달의 HTML 구조를 동적으로 생성
    const modalHTML = `
        <div class="modal fade" id="myModal" tabindex="-1" aria-labelledby="myModalLabel" aria-hidden="true">
            <div class="modal-dialog modal-dialog-centered">
                <div class="modal-content">
                    <div class="modal-header">
                        <h5 class="modal-title" id="myModalLabel">${title}</h5>
                    </div>
                    <div class="modal-body">
                        ${message}
                    </div>
                    <div class="modal-footer">
                        <button type="button" class="btn btn-secondary" id="modal-closeBtn" data-bs-dismiss="modal">닫기</button>
                        <button type="button" class="btn btn-primary" id="modal-actionBtn" >${action}</button>
                    </div>
                </div>
            </div>
        </div>
    `;

    // 모달 HTML을 body에 추가
    document.body.insertAdjacentHTML('beforeend', modalHTML);

    // Bootstrap 모달 인스턴스를 생성하고 표시
    const modalElement = document.getElementById("myModal");
    const myModal = new bootstrap.Modal(modalElement);

    // 모달을 표시
    myModal.show();

    // // 모달이 닫힐 때 포커스를 제거하는 처리
    document.addEventListener('hide.bs.modal', function (event) {
        if (document.activeElement) {
            document.activeElement.blur();
        }
    });
}
4️⃣ Modal 연결하기
- 버튼을 클릭했을 시에 title과 message, action 을 따로 변경 가능할 수 있게끔 했다.
- 이 함수를 응용하면 데이터가 들어올 때마다 동적으로 데이터에 맞는 title과 message, action를 다룰 수 있다. > 이 부분은 맨 아래에 예시로 보여주겠다.
- 아래의 코드를 <script="module"></script> 안에 넣어주면 된다.
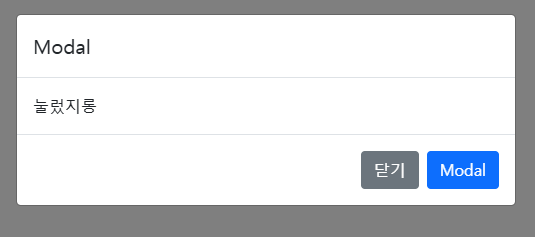
$(document).on('click', '#test-modal', async function () {
    actionModal("Modal", "눌렀지롱","Modal");
});
5️⃣ 실제 실행화면
✅ Toast + Modal 같이 사용
- 이제 응용하는 방법을 보여주겠다.
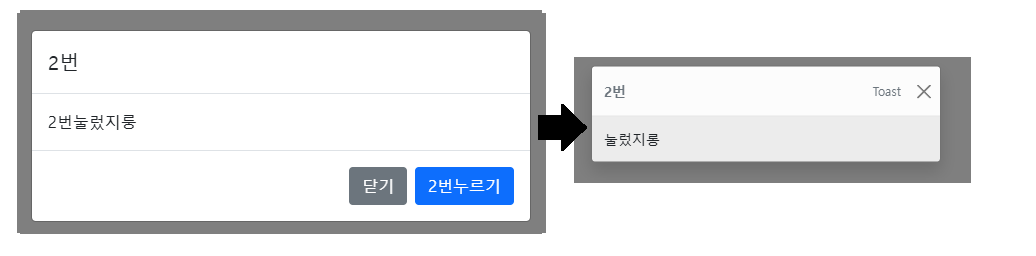
- 버튼을 누를시 Modal 이 나오고, 그 후 Toast가 나오도록 해보겠다.

1️⃣ 함수 작성
- 아래의 코드를 <script="module"></script> 안에 넣어주면 된다.
$(document).on('click', '#test-1', async function () {
    actionModal("1번", "1번눌렀지룽", "1번누르기");

    $(document).on('click', '#modal-actionBtn', async function () {
        $("#myModal").remove()
        showToast("1번", "눌렀지롱");
        setTimeout(() => {
            window.location.reload();
        }, 3000);
    })
    $(document).on('click', '#modal-closeBtn', async function () {
        showToast("1번", "닫기눌렀지룽");
    })
});
2️⃣ 실제 실행화면
✅ 전체코드 공유
<!DOCTYPE html>
<html>

<head>
    <meta charset="UTF-8">
    <meta name="viewport" content="width=device-width, initial-scale=1.0">
    <title>ToDoApp</title>
    <link href="https://cdn.jsdelivr.net/npm/bootstrap@5.0.2/dist/css/bootstrap.min.css" rel="stylesheet"
        integrity="sha384-EVSTQN3/azprG1Anm3QDgpJLIm9Nao0Yz1ztcQTwFspd3yD65VohhpuuCOmLASjC" crossorigin="anonymous">
    <script src="https://code.jquery.com/jquery-3.6.4.min.js"></script>
    <script src="https://cdn.jsdelivr.net/npm/bootstrap@5.1.0/dist/js/bootstrap.bundle.min.js"></script>

    <style>
        #button-group {
            margin: auto;
            display: flex;
            justify-content: center;
            align-items: center;
            text-align: center;
            margin: 20px;
        }

        #button-group>button {
            margin: 20px;
            padding: 20px;
        }

        #toast-container {
            position: fixed;
            top: 50%;
            left: 50%;
            transform: translate(-50%, -50%);
            z-index: 9999;
        }
    </style>
    <script type="module">
        // Toast 만들기
        function showToast(title, message) {
            var htmlToast = `
                <div class="toast" role="alert" aria-live="assertive" aria-atomic="true">
                    <div class="toast-header">
                        <strong class="me-auto">${title}</strong>
                        <small class="text-body-secondary">Toast</small>
                        <hr class="sep-3" />
                        <button type="button" id="toast-closeBtn" class="btn-close" data-bs-dismiss="toast" aria-label="Close"></button>
                    </div>
                    <div class="toast-body">
                        ${message}
                    </div>
                </div>
                `
            // 값이 있으면 remove 해주기
            $("#dynamicToast").remove()
            // jQuery로 Toast를 페이지에 추가
            $("#toast-container").html(htmlToast);

            // Bootstrap Toast 활성화
            let toastElement = new bootstrap.Toast($('#toast-container .toast')[0]);
            toastElement.show();
        }

        // 토스트 닫기 누르면 리로드 됨.
        $(document).on("click", "#toast-closeBtn", async function () {
            window.location.reload();
        })

        // 모달 만들기
        // Modal을 전달.
        function actionModal(title, message, action) {
            // 모달의 HTML 구조를 동적으로 생성
            const modalHTML = `
                <div class="modal fade" id="myModal" tabindex="-1" aria-labelledby="myModalLabel" aria-hidden="true">
                    <div class="modal-dialog modal-dialog-centered">
                        <div class="modal-content">
                            <div class="modal-header">
                                <h5 class="modal-title" id="myModalLabel">${title}</h5>
                            </div>
                            <div class="modal-body">
                                ${message}
                            </div>
                            <div class="modal-footer">
                                <button type="button" class="btn btn-secondary" id="modal-closeBtn" data-bs-dismiss="modal">닫기</button>
                                <button type="button" class="btn btn-primary" id="modal-actionBtn" >${action}</button>
                            </div>
                        </div>
                    </div>
                </div>
            `;

            // 모달 HTML을 body에 추가
            document.body.insertAdjacentHTML('beforeend', modalHTML);

            // Bootstrap 모달 인스턴스를 생성하고 표시
            const modalElement = document.getElementById("myModal");
            const myModal = new bootstrap.Modal(modalElement);

            // 모달을 표시
            myModal.show();

            // // 모달이 닫힐 때 포커스를 제거하는 처리
            document.addEventListener('hide.bs.modal', function (event) {
                if (document.activeElement) {
                    document.activeElement.blur();
                }
            });
        }

        // Edit Btn 수정 버튼 test1~4 까지
        $(document).on('click', '#test-1', async function () {
            actionModal("1번", "1번눌렀지룽", "1번누르기");

            $(document).on('click', '#modal-actionBtn', async function () {
                $("#myModal").remove()
                showToast("1번", "눌렀지롱");
                setTimeout(() => {
                    window.location.reload();
                }, 3000);
            })
            $(document).on('click', '#modal-closeBtn', async function () {
                showToast("1번", "닫기눌렀지룽");
            })
        });

        $(document).on('click', '#test-2', async function () {
            actionModal("2번", "2번눌렀지룽", "2번누르기");

            $(document).on('click', '#modal-actionBtn', async function () {
                $("#myModal").remove()
                showToast("2번", "눌렀지롱");
                setTimeout(() => {
                    window.location.reload();
                }, 3000);
            })
            $(document).on('click', '#modal-closeBtn', async function () {
                showToast("2번", "닫기눌렀지룽");
            })
        });


        $(document).on('click', '#test-3', async function () {
            actionModal("3번", "3번눌렀지룽", "3번누르기");

            $(document).on('click', '#modal-actionBtn', async function () {
                $("#myModal").remove()
                showToast("3번", "눌렀지롱");
                setTimeout(() => {
                    window.location.reload();
                }, 3000);
            })
            $(document).on('click', '#modal-closeBtn', async function () {
                showToast("3번", "닫기눌렀지룽");
            })
        });

        $(document).on('click', '#test-4', async function () {
            actionModal("4번", "4번눌렀지룽", "4번누르기");

            $(document).on('click', '#modal-actionBtn', async function () {
                $("#myModal").remove()
                showToast("4번", "눌렀지롱");
                setTimeout(() => {
                    window.location.reload();
                }, 3000);
            })
            $(document).on('click', '#modal-closeBtn', async function () {
                showToast("4번", "닫기눌렀지룽");
            })
        });


        $(document).on('click', '#test-toast', async function () {
            showToast("Toast", "눌렀지롱");
        });


        $(document).on('click', '#test-modal', async function () {
            actionModal("Modal", "눌렀지롱","Modal");
        });


    </script>
</head>

<body>
    <div id="toast-container"></div>
    <div id="button-group">
        <button type="button" id="test-1">1번</button>
        <button type="button" id="test-2">2번</button>
        <button type="button" id="test-3">3번</button>
        <button type="button" id="test-4">4번</button>
        <button type="button" id="test-toast">Toast</button>
        <button type="button" id="test-modal">Modal</button>
    </div>
</body>

</html>
실행화면은 아래와 같다.
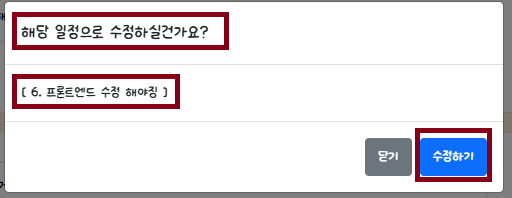
✅ 응용 코드 공유
$(document).on('click', '.deleteBtn', async function () {
let check_id = $(this).closest('li').attr('id');
let task_text = $(this).closest('li').find('input[type="text"]').val().trim();
actionModal("이 일정을 삭제하시겠습니까?", "[ " + task_text + " ]", "삭제하기");
$(document).one('click', '#modal-actionBtn', async function () {
const docRef = doc(db, 'todos', check_id);
try {
await deleteDoc(docRef);
$("#dynamicModal").remove()
showToast("[ " + task_text.slice(0, 8) + "... ] 삭제여부", "삭제되었습니다.");
} catch (error) {
console.error("삭제 실패: ", error);
}
})
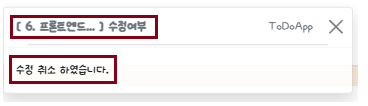
$(document).on('click','#modal-closeBtn', async function (){
showToast("[ " + task_text.slice(0, 8) + "... ] 삭제여부", "수정 취소 하였습니다.");
})
});실행 화면은 아래와 같다.
- 동영상에서 보다시피, 데이터 별로 다른 값을 줄 수 있다. 동적으로 추가된 div 요소에서 data 를 뽑아와 toast와 modal에 넣은 것이다.
'프로젝트 > ToDoApp프로젝트-FireBase' 카테고리의 다른 글
| [ToDoApp-Firebase] Web 구현 01 (0) | 2025.02.08 |
|---|---|
| [ToDoApp-Firebase] 프로젝트 기획 및 설계 (1) | 2025.02.08 |